Running out of space for games, screenshots, and save files is one of the most common problems gaming PC owners face, especially as modern titles grow well beyond a hundred gigabytes each. This guide walks you through how to add more storage to your gaming PC, covering the different drive types available, how to physically install them, and how to get Windows to recognise the new space. It suits anyone comfortable opening their PC case, whether you are adding a second drive or replacing an ageing one.
Table of Contents
What you’ll need
- A new storage drive (SATA SSD, NVMe SSD, or traditional hard drive)
- A Phillips head screwdriver
- An anti-static wrist strap or a habit of touching bare metal before handling components
- A SATA data cable and free SATA power connector (if installing a SATA drive)
- Your motherboard manual, to confirm available drive bays or M.2 slots
- A USB drive with a Windows installer, only needed if the new drive will become your main boot drive
Choosing the right type of storage
Before opening the case, decide which kind of drive fits your needs and your motherboard. There are three common options, each with different speed, capacity, and installation requirements.
| Drive type | Typical use | Installation method |
|---|---|---|
| NVMe M.2 SSD | Fastest option, ideal for a boot drive or frequently played games | Slots directly onto the motherboard, no cables needed |
| SATA SSD | Good balance of speed and capacity for a secondary drive | Mounted in a drive bay, connected via SATA data and power cables |
| Traditional hard drive (HDD) | Best for large media libraries or game archives where speed matters less | Mounted in a 3.5-inch bay, connected via SATA cables |
Check your motherboard specifications to confirm how many M.2 slots and SATA ports are available, and whether any are already in use. If you are unsure what your current setup supports, the guide on choosing compatible gaming PC parts is a useful reference before you buy anything.
Preparing your PC
- Shut down the PC completely and switch off the power supply at the wall.
- Unplug the power cable and press the power button briefly to discharge any remaining electricity in the system.
- Open the side panel of your case, usually by removing a couple of screws or releasing a latch.
- Ground yourself by wearing an anti-static strap or touching an unpainted metal part of the case before handling any components.
Installing an NVMe M.2 SSD
- Locate an empty M.2 slot on your motherboard, usually found near the CPU socket or below the graphics card.
- Remove the small screw holding the mounting standoff, if one is fitted, and set it aside.
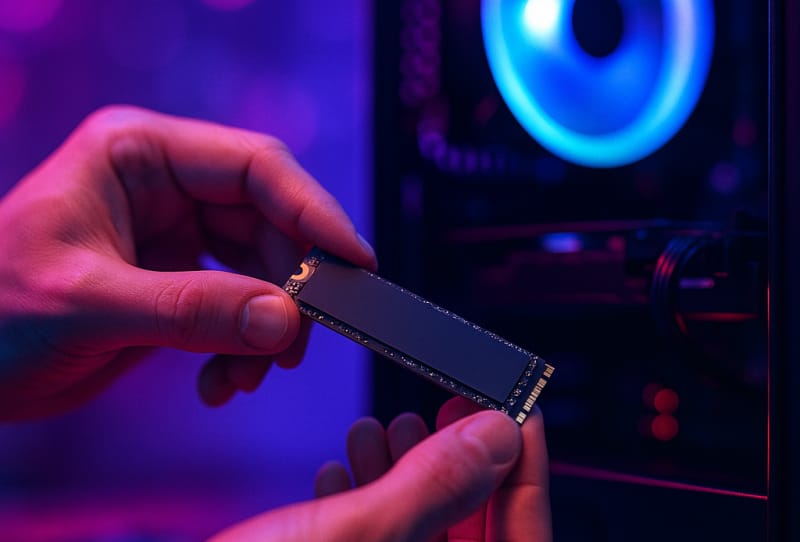
- Insert the M.2 drive into the slot at a slight angle, lining up the notch on the connector with the slot.
- Gently press the drive down flat and secure it with the small screw.
- If your motherboard includes an M.2 heatsink cover, refit it now to help with cooling.
Installing a SATA SSD or hard drive
- Find an empty drive bay in your case, typically located in a cage near the front or bottom of the chassis.
- Slide the drive into the bay and secure it using the screws or tool-free mounting bracket provided with your case.
- Connect one end of a SATA data cable to the drive and the other end to an available SATA port on the motherboard.
- Connect a spare SATA power connector from the power supply to the drive.
- Double check both cables are firmly seated, as loose SATA connections are a common cause of drives not being detected.
If you are still deciding on a case with enough bays for future upgrades, the guide to choosing the right gaming PC case covers what to look for in terms of drive capacity and airflow.
Setting up the new drive in Windows
- Close the case, reconnect the power, and turn the PC on.
- Open Disk Management by right-clicking the Start menu and selecting it from the list, or by searching for it.
- Locate the new drive in the list, which will usually appear as “unallocated” space.
- Right-click the unallocated space and choose to create a new simple volume.
- Follow the prompts to assign a drive letter and format the drive, typically using the NTFS file system for a Windows PC.
- Once formatted, the drive will appear in File Explorer and be ready to store games, files, or backups.
For an authoritative walkthrough of this process, Microsoft’s guide to initialising new disks covers the disk initialisation steps in more detail. If you would rather use the new drive as your main boot drive, you will need to install Windows fresh onto it and choose it as the boot device in your system firmware.
Tips and troubleshooting
- If a new SATA drive does not appear in Windows, check the connection first, then confirm the drive is initialised in Disk Management rather than assuming it is faulty.
- Avoid mixing up SATA data and power cables when working in a tight case, since they look similar but are not interchangeable.
- NVMe drives can run hot under sustained load, so a heatsink or good case airflow helps maintain performance over time. If your system already runs warm, it is worth reviewing whether your gaming PC needs better cooling before adding more components.
- Keep your most-played games on the fastest drive available, and use slower or larger drives for archives, recordings, and less frequently used titles.
- Always back up important files before repartitioning or formatting any drive, since these actions can erase existing data.
Frequently asked questions
Can I add storage without reinstalling Windows?
Yes. Adding a second or third drive purely for extra storage does not require reinstalling Windows. You only need to reinstall Windows if you intend to make the new drive your primary boot drive.
Do I need an M.2 SSD or is a SATA SSD good enough?
An M.2 NVMe SSD offers noticeably faster load times and is ideal for your operating system and most-played games. A SATA SSD is still much faster than a traditional hard drive and works well as extra storage for a growing game library.
How do I know if my motherboard has a free M.2 slot?
Check your motherboard’s manual or the manufacturer’s product page for the number of M.2 slots and their supported drive lengths. Visually inspecting the motherboard for an empty slot near the CPU is also a quick way to confirm.
What should I do if Windows does not detect my new drive?
Open Disk Management to see if the drive appears as unallocated space, since new drives often need to be initialised before they show up in File Explorer. If it does not appear at all, reseat the cables or the M.2 module and check the connection again.