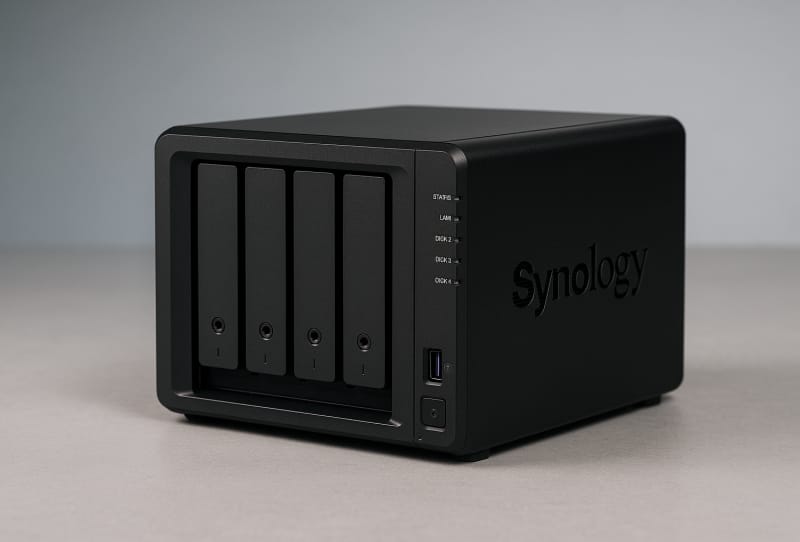
Setting up a new Synology NAS for the first time can feel daunting if you have never touched one before, but the process is straightforward once you know the order of operations. This guide walks you through how to install and configure Synology NAS storage, covering everything from fitting the drives to creating a volume and switching on remote access. It suits anyone unboxing a Synology unit for the first time, whether it is going into a home office or a small business rack.
Table of Contents
What you’ll need
- A Synology NAS enclosure
- One or more compatible hard drives or SSDs (check Synology’s compatibility list for your model)
- An Ethernet cable and a spare port on your router or switch
- A computer, tablet, or phone on the same network
- A screwdriver, if your model uses screw-mounted drive trays
- A Synology account, which is free to create and needed for remote access features
Installing the drives
- Power off the NAS and remove the drive trays from the front of the unit.
- Slide each hard drive or SSD into a tray, lining up the connector pins with the back of the tray.
- Secure the drive using the tray’s clips or screws, depending on your model.
- Slide each loaded tray back into its bay and push firmly until it locks into place.
- Connect the power cable and an Ethernet cable from the NAS to your router, then switch the unit on.
Connecting the NAS and installing DSM
- On a computer connected to the same network, open a web browser and go to Synology’s find.synology.com locator page, or check your router’s connected devices list for the NAS.
- Select your NAS once it appears and follow the prompt to install DiskStation Manager (DSM), the operating system that runs on all Synology NAS units.
- Wait while the installer downloads and applies the latest DSM version. The NAS will restart automatically during this process.
- Create an administrator account with a strong password when prompted. This account manages the entire system, so avoid reusing a password from another service.
- Choose whether to enable Synology’s recommended security and update settings, then confirm to finish the initial setup wizard.
Creating a storage pool and volume
Once DSM is running, the next job is turning your physical drives into usable storage. Synology groups drives into a storage pool, then divides that pool into one or more volumes where your shared folders and apps actually live. If you installed more than one drive, you will also choose a RAID type, which determines how much protection you get against a drive failure.
- Open Storage Manager from the DSM main menu.
- Select the option to create a new storage pool and choose the drives you want to include.
- Pick a RAID type based on how many drives you have and how much redundancy you want (see the table below for guidance).
- Confirm the settings and let the system build the storage pool. This can take a while on larger drives, but the NAS remains usable during this process.
- Create a volume on top of the new storage pool, choosing the file system Synology recommends for your model.
| RAID type | Minimum drives | Protection against drive failure | Best for |
|---|---|---|---|
| Basic | 1 | None | Single-drive units or non-critical data |
| SHR (Synology Hybrid RAID) | 1 or more | Flexible, depends on drive count | Most home users with mixed drive sizes |
| RAID 1 | 2 | Survives one drive failure | Two-bay units wanting simple mirroring |
| RAID 5 | 3 | Survives one drive failure | Balancing capacity and protection |
| RAID 6 | 4 | Survives two drive failures | Larger arrays needing extra safety |
| RAID 10 | 4 | Survives multiple failures, depending on layout | Performance-focused setups |
Setting up shared folders and remote access
- In DSM, open Control Panel and go to Shared Folder to create folders for documents, photos, backups, or media.
- Set permissions for each folder so only the right user accounts can read or write to them.
- Create additional user accounts for anyone else who needs access, rather than sharing the administrator login.
- Open QuickConnect in Control Panel if you want to access your files securely from outside your home network, and link it to your Synology account.
- Install the Synology mobile or desktop apps if you want to browse files or back up devices to the NAS remotely.
Tips and troubleshooting
If the NAS does not appear during the discovery step, double check the Ethernet cable and confirm your computer is on the same network, not connected through a guest Wi-Fi band. Drive installation problems are usually down to a tray not being fully seated, so reseat any drive that DSM does not detect. When choosing a RAID type, remember that redundancy is not a backup on its own. It protects against a drive failure, but it will not save your data from accidental deletion, theft, or fire, so consider a separate backup plan for anything irreplaceable. If you plan to connect the NAS to your router in a more advanced setup, it helps to read up on how to connect your NAS to your home router correctly, particularly if you are using static IP addresses or VLANs.
Frequently asked questions
Do I need to buy Synology-branded hard drives?
No, most Synology NAS models accept a range of third-party hard drives and SSDs, but it is worth checking the compatibility list for your specific model before buying, since untested drives can behave unpredictably.
What happens if a drive fails after setup?
If you used a redundant RAID type such as SHR, RAID 1, RAID 5, or RAID 6, the NAS keeps running on the remaining drives and alerts you through DSM. Replace the failed drive as soon as possible so the system can rebuild the array.
Can I add more storage later?
Many Synology models support expanding a storage pool by adding drives or replacing existing ones with larger capacity drives, though the exact process depends on your enclosure and RAID type. Check DSM’s Storage Manager for expansion options specific to your setup.
Is QuickConnect the only way to access my NAS remotely?
No, QuickConnect is the simplest option for most home users, but you can also set up a VPN connection or configure port forwarding on your router for remote access, which some users prefer for extra control over security.