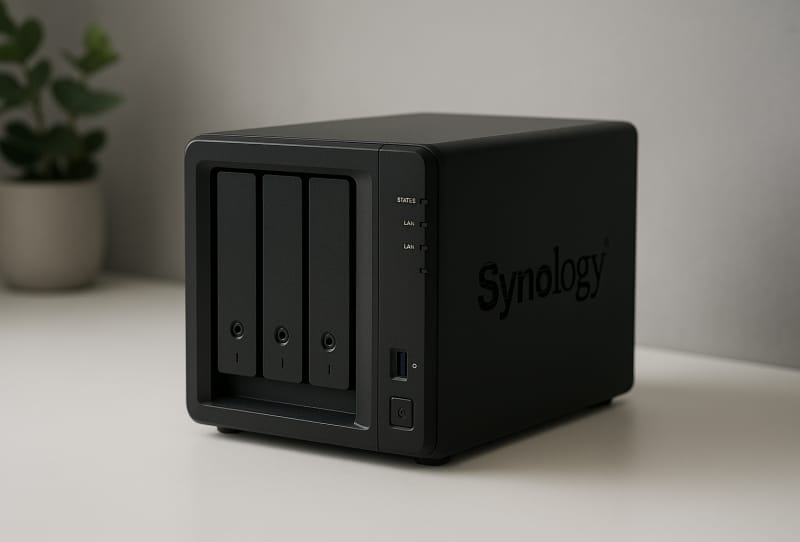
Setting up a Synology NAS for the first time looks daunting if you have never handled network storage before, but the process is straightforward once you know the order of operations. This guide walks you through how to set up Synology NAS hardware and software from the moment you open the box, through installing DiskStation Manager (DSM), creating your storage volume, and enabling remote access so you can reach your files from anywhere.
Table of Contents
What you’ll need
- A Synology NAS unit and its power adapter
- One or more compatible hard drives or SSDs (check Synology’s compatibility list before buying)
- An Ethernet cable and a free port on your router or switch
- A computer or laptop on the same local network as the NAS
- A web browser
- A screwdriver, if your drives require screws to mount in the trays
Step 1: Install the hard drives
- Unpack the NAS and confirm the box includes the power cord, LAN cables, drive tray keys, and any mounting screws.
- Pull the drive tray out of the bay and remove the fastening panels on its sides.
- Slide the drive into the tray and reattach the fastening panels to hold it in place. If you’re using a 2.5-inch SSD, secure it with the smaller screws provided instead.
- Slide the tray back into the bay until it clicks into place, then use the included key to lock it if you want to prevent accidental removal later.
Step 2: Connect and power on the NAS
- Plug the AC adapter into the NAS and into a power outlet.
- Connect an Ethernet cable from the NAS to your router or switch. For more detail on getting this part right, see this guide on connecting your NAS to your home router.
- Press the power button to switch the NAS on. Make sure your computer is connected to the same network, whether by Wi-Fi or Ethernet.
Step 3: Install DSM (DiskStation Manager)
- Open a web browser on your computer and go to find.synology.com. On some models you can also try synologynas:5000 in the address bar, or synologynas.local:5000 on a Mac.
- Web Assistant should locate your NAS on the network with a status of “Not installed”. If it doesn’t appear, download Synology Assistant from the Synology Download Center and use it to search for the device instead.
- Click Connect (or Set up) to begin the DSM installation.
- Click Install Now to begin. Note that this step erases any existing data on the drives, so don’t skip checking your disks beforehand if they’ve been used before.
- Confirm the installation and wait while DSM copies itself onto the NAS. Do not power the unit off during this process. The NAS will restart automatically and you’ll hear a short beep once installation finishes.
Step 4: Create your administrator account and configure updates
- Once DSM restarts, you’ll be prompted to create the administrator account. Enter a server name, username, and password. These are the credentials you’ll use to log into DSM and its services going forward, so choose a strong password.
- Select how you want DSM updates handled. Choosing automatic installation of the latest version is generally the safest option, since it keeps your NAS patched against security issues.
- You can skip the QuickConnect setup at this stage if prompted; it’s covered separately below.
- Click through to finish the DSM installation and log in to start using your NAS.
Step 5: Create a storage pool and volume
Before you can store files, you need to create a volume. This is where Synology Hybrid RAID (SHR) is worth understanding, since it’s designed to make efficient use of mixed-capacity drives while still offering redundancy.
- Open Storage Manager from the DSM main menu and select Volume.
- Click Create and follow the setup wizard.
- Choose Quick if you want SHR to handle the RAID configuration automatically, or Custom if you want to pick a specific RAID type yourself.
- If your NAS has four or more drives, consider SHR-2, which tolerates two simultaneous drive failures rather than one.
- Select the drives you want to include in the volume and confirm that you understand all data on them will be erased.
- Choose a file system. Btrfs is generally recommended over the older ext4, as it supports features like snapshots and better data integrity checks.
- Apply the settings to finish. The system will run a parity check in the background, but you can start using the NAS while this runs.
Step 6: Set up QuickConnect for remote access
- Register a Synology Account at account.synology.com if you don’t already have one.
- In DSM, go to Control Panel, then QuickConnect, and enable it.
- Sign in with your Synology Account when prompted.
- Choose a QuickConnect ID and apply the settings. This ID lets you reach your NAS remotely without manually configuring port forwarding.
Once this is done, you can also explore setting up remote access in Plex if you plan to stream media stored on your NAS while away from home.
Step 7: Install packages and apps
- Open Package Center in DSM to browse and install add-ons for backup, file syncing, surveillance, multimedia, and more.
- Install the corresponding mobile apps from Google Play or the App Store so you can access files and manage the NAS from your phone.
- If media streaming is your goal, take a look at how to set up Plex on a Synology NAS once your volume is ready.
Tips and troubleshooting
- If Web Assistant can’t find your NAS, double check that both devices are on the same network segment, then try Synology Assistant as a backup method.
- Always confirm drive compatibility before installation to avoid performance issues or drives not being recognised.
- Don’t interrupt power during DSM installation or a firmware update, as this can corrupt the install and require a full reset.
- If your internet connection feels slow when streaming from the NAS remotely, it may be worth reviewing your setup with this guide to faster internet for streaming, gaming, and work.
- Keep at least one drive bay free if you plan to expand storage later, and consider SHR if your drives are different sizes, since it makes better use of mismatched capacities than standard RAID.
Frequently asked questions
Do I need to buy hard drives separately for a Synology NAS?
Yes, most Synology NAS units are sold as bare enclosures without drives included. You’ll need to purchase compatible 3.5-inch or 2.5-inch drives separately and check them against Synology’s official compatibility list before installing.
What is the difference between SHR and standard RAID?
Synology Hybrid RAID is designed to make the most of drives with different capacities while still providing redundancy, whereas standard RAID levels typically require matching drive sizes to avoid wasting space. SHR is generally the simpler choice for home users.
Can I access my Synology NAS without QuickConnect?
Yes, you can configure manual port forwarding on your router or use a VPN to reach your NAS remotely, but QuickConnect is the simplest option since it avoids manual network configuration.
How long does DSM installation take?
Installation is usually quick, often just a few minutes, though it varies depending on your NAS model and network speed. The unit will restart automatically once the process finishes.